Handle an erasure request
Find a customer's profile, file an audited erasure, follow it to completion and keep the evidence.
This guide answers a customer who asks you to delete their personal data. You find their profile, file an erasure request, follow it until it completes, and keep the trail that shows you handled it.
Before you start
- Check the request first, outside Optima. Confirm who is asking and what they asked for: all of their data, only identifying data, data collected for one purpose, or particular attributes.
- Opening a profile needs
data_viewer. Filing needsprivacy_officer(the server checks it) and profile write access such asdata_editor(the menu item is disabled without it). Ask your administrator to give the person filing both. Following the request under Privacy needsprivacy_officer,privacy_viewerorauditor. Or use another role your administrator has given access to these areas — see Licences and roles. - Privacy is part of the core licence.
Step 1: Find the customer
- Open Profiles in the Data group.
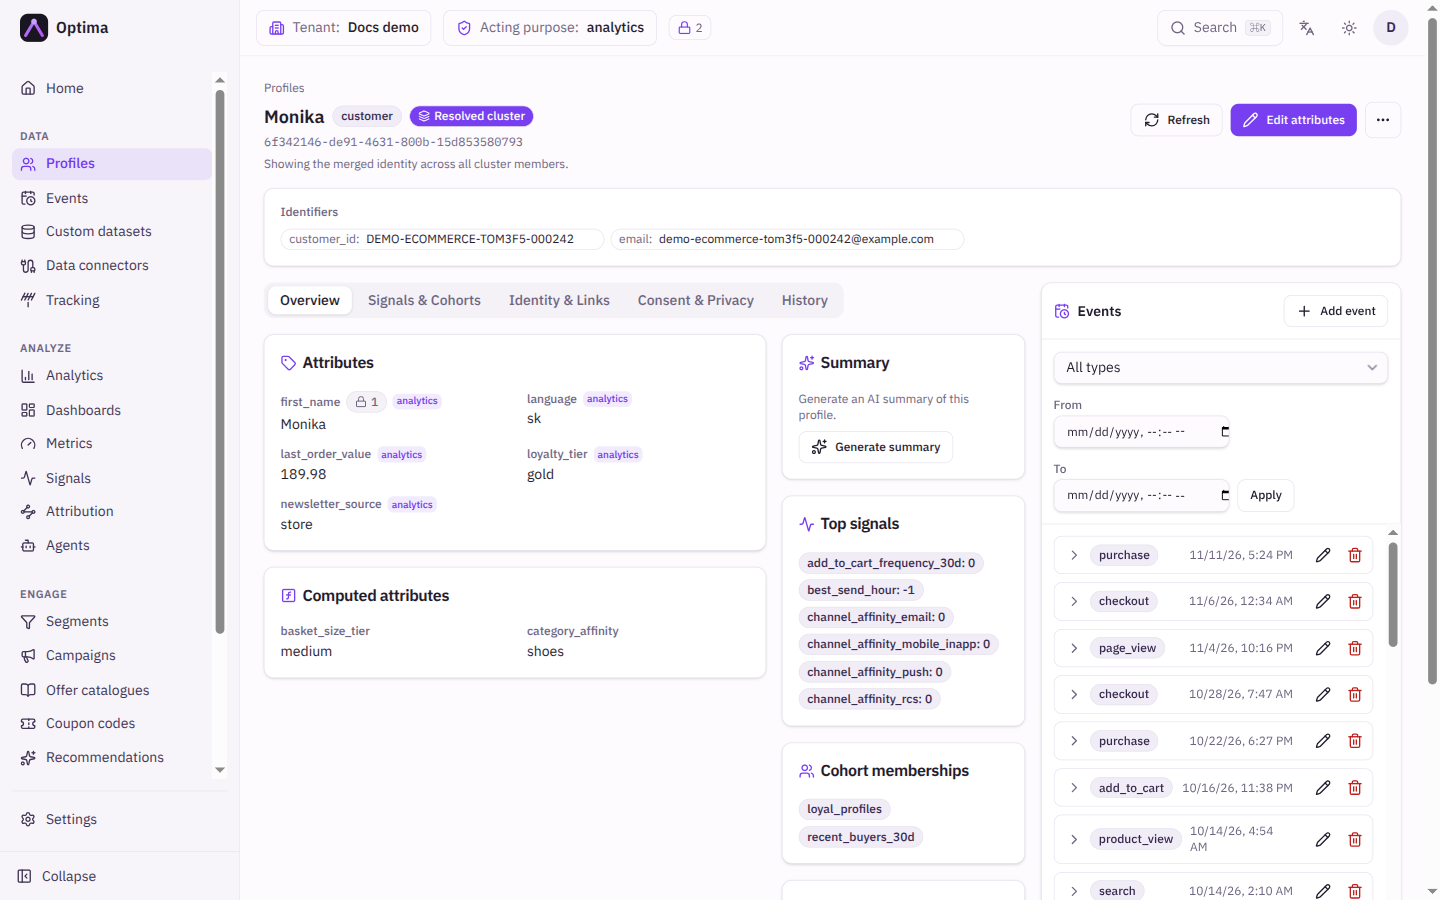
- Choose By identifier, pick the Entity type (for example
customer), the Identifier key (for exampleemail) and enter the Identifier value. Select Look up. - Select the row to open the profile. Check that the identifiers and attributes are those of the person who wrote to you.
If the customer used several addresses or devices, look up each identifier. The page shows Resolved cluster when identity resolution has joined several profiles into one customer. Open Identity & Links to see every Cluster members profile. See Identity.
If you need to answer "what do you hold about me" before erasing, read Overview, Consent & Privacy and the events panel, after choosing the right purpose with Choose a purpose if a notice says attributes are hidden. See Profile detail.
Step 2: Choose the scope
Decide what the erasure covers.
| Scope | Use it for |
|---|---|
| full | The customer asked to be forgotten completely. |
| PII only | Remove personal identifiers and sensitive attributes but keep the rest for statistics. |
| purpose | Remove only what was collected under one consent purpose, for example marketing. |
| attribute list | Remove particular attributes by key, for example email. Use attribute keys, not identifier values. |
A purpose request needs a purpose that exists in your catalogue, and an attribute list request needs at least one attribute key. Do not give a purpose or attribute keys with any other scope. The request is refused with an error instead of being filed.
Step 3: File the request
- On the profile select More actions → Request erasure.
- Choose the Scope. For purpose, pick the Purpose. For attribute list, enter the attribute keys, each followed by Enter.
- Confirm. The request is created and audited under your name.
If the customer has more than one profile, repeat the request on each profile that belongs to them.
Do not use Delete profile or Delete filtered… for a request to be forgotten. They are technical deletes that are not audited as erasures and do not cover derived data. Use them only for operational clean-up.
Step 4: Follow it to completion
- Open Settings → Workspace → Privacy and the Erasure tab.
- Find the request in Erasure requests. Filter by Status if the list is long: Pending, In progress, Completed or Failed. Or use Look up an erasure request by ID.
- Select the row to see the detail. It shows who requested it, when, and when it Completed.
- Refresh until the status is Completed. While it is In progress, the phase under the status shows where it is (Erasing, Sweep scheduled or Verifying) and, when a sweep is waiting, "next check ~" with when it is due. The data is usually gone within minutes, but the request completes only after a second sweep and a final check, once the configured sweep delay has passed (60 minutes by default) after filing.
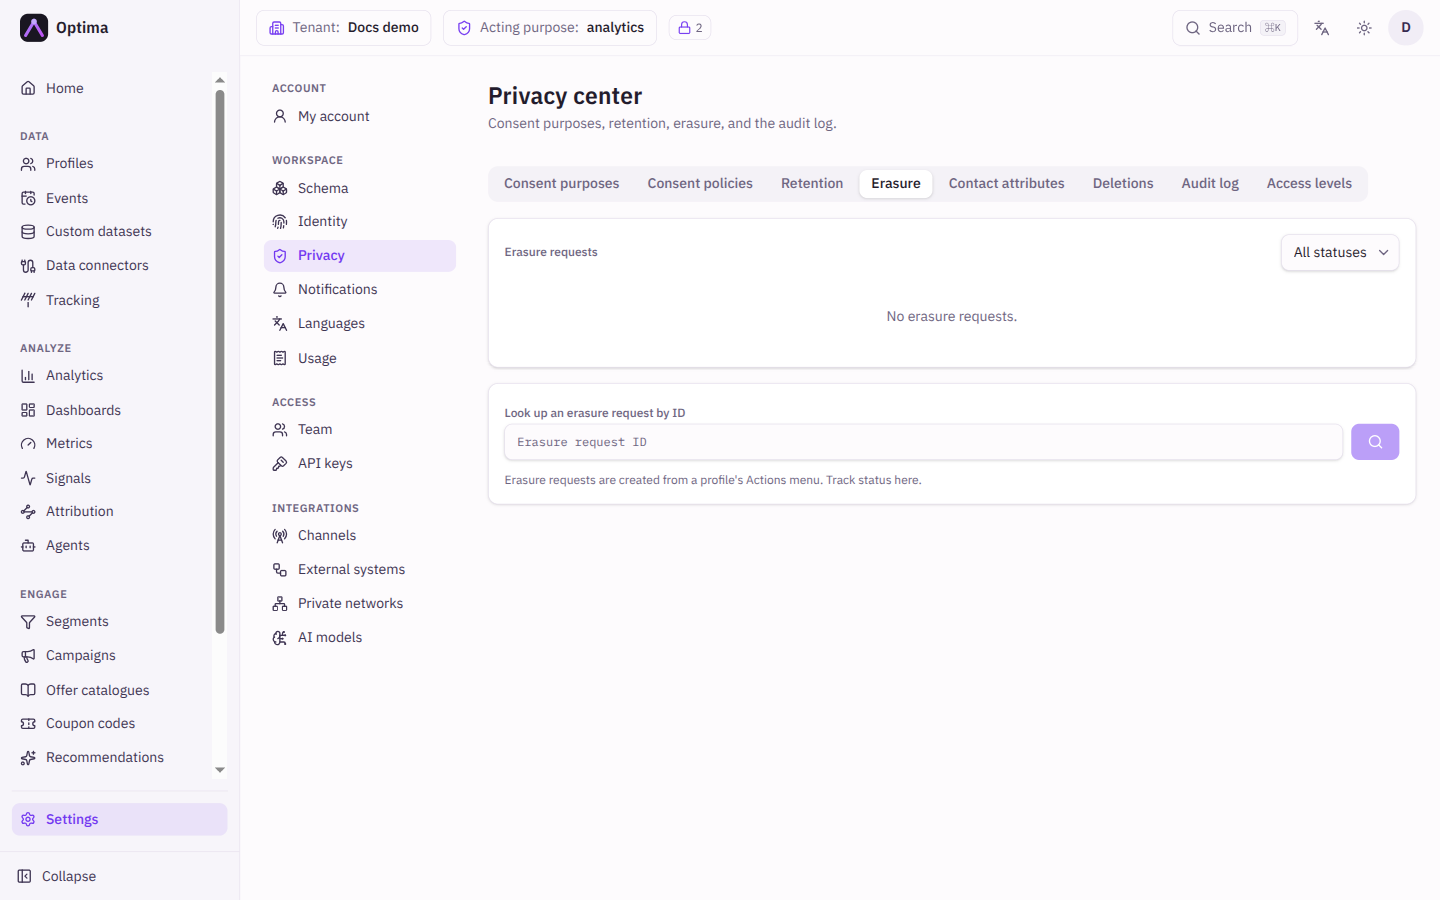
If the status is Failed, open it and read the Last error. If the cause is not clear, contact your Optima support with the request ID.
Step 5: Keep the evidence
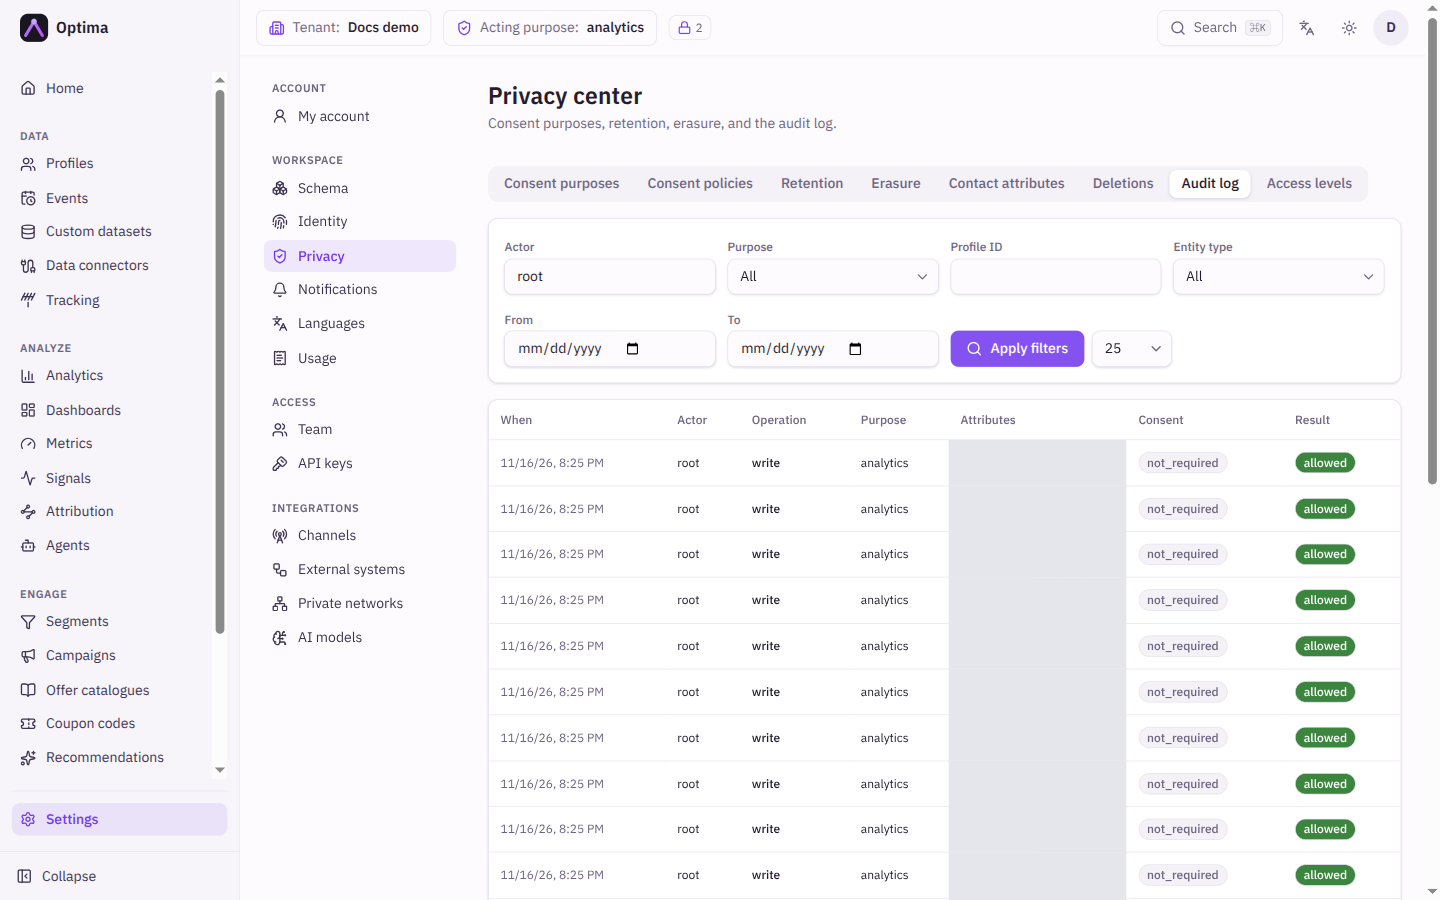
- Open the Audit log tab. Filter by Profile ID to see every read and write of that profile, with the Actor, Operation, Purpose and Result.
- Note the request ID, the scope, the completion time and who filed it in your own records. This is the answer if the customer or a regulator asks.
- Reply to the customer.
Check that it worked
- The request reads Completed.
- Look the identifier up again in Profiles. After a full erasure the customer's personal data is gone. After a purpose or attribute list erasure, the data you named is gone and the rest remains.
- The customer drops out of any identity cluster the next time resolution runs.
Make withdrawal erase automatically
For a purpose that must not outlive consent, set On withdrawal to erase data in Consent purposes. When a customer who had granted the purpose withdraws, a purpose-scoped erasure starts on its own and appears under Erasure. This cannot be combined with a channel-scoped purpose or one shown in the preference centre. See Privacy.
Common problems
- Request erasure is missing or disabled. The menu item needs profile write access such as
data_editor, and the server also requiresprivacy_officer. Ask your administrator to give the person filing both. - Erasure scope purpose lists no purpose. No consent purposes exist yet. Create them under Privacy first.
- The customer is still found. Another profile of the same customer holds the identifier. Check Cluster members and look up their other identifiers.
- The request stays Pending or In progress. Large profiles take a while. If it does not move, contact your Optima support.
Next steps
- Review who read the customer's data before: Privacy, Audit log.
- Expire old data automatically with a retention policy on the Retention tab.
- Consent and purposes explains the model behind scopes and purposes.
Collect sign-ups with double opt-in
Create a newsletter sign-up form with a hosted page, require the visitor to confirm by email, and check that consent is recorded.
Set up your team
Invite colleagues, give them roles, decide which purposes and how much sensitive data they may use, and create API keys for your integrations.