Send a welcome journey
Write a welcome email, build a journey that sends it when someone signs up and follows up after a wait and a split, test it and launch it.
This guide builds a three-step welcome flow. A new customer gets a welcome email straight away, waits two days, and then receives one of two follow-up emails. You write the messages, draw the journey, check it with pre-flight and launch it.
Before you start
- You need
content_editorfor templates,campaign_editorfor campaigns and journeys, and an approver (campaign_approverorcampaign_admin) to activate, or to approve your request. Or use another role your administrator has given access to these areas — see Licences and roles. - Journeys, templates and campaigns belong to the Campaign package. The Describe journey shortcut needs the AI assistants package; this guide draws the journey by hand.
- An email provider is set up under Settings → Integrations → Channels. In a Sandbox or Development environment sends are built and recorded but nothing reaches real people, which is the safest place to practise.
- An event type that marks a sign-up exists in your schema, for example
account_created, and your sign-up flow records it. See Events. - A consent purpose for your marketing messages, for example
marketing, exists. See Consent and purposes.
Step 1: Write the messages
You need three email templates: welcome, welcome-tips and welcome-offer. Repeat these steps for each.
- Open Templates & content in the Engage group. On Message templates select New template.
- Enter the Name and choose the Entity type, for example
customer. Under Channel keep Email. - Fill in the Subject and the HTML body or Text body. Personalize with the Personalization button or type the tags yourself:
Welcome, {{default "there" .Profile.Attributes.first_name}}!- Add the unsubscribe link from the personalization picker's Unsubscribe links group.
- Select Render preview, enter a Profile ID or sample values, and select Render to see what a real customer would get.
- Select Create.
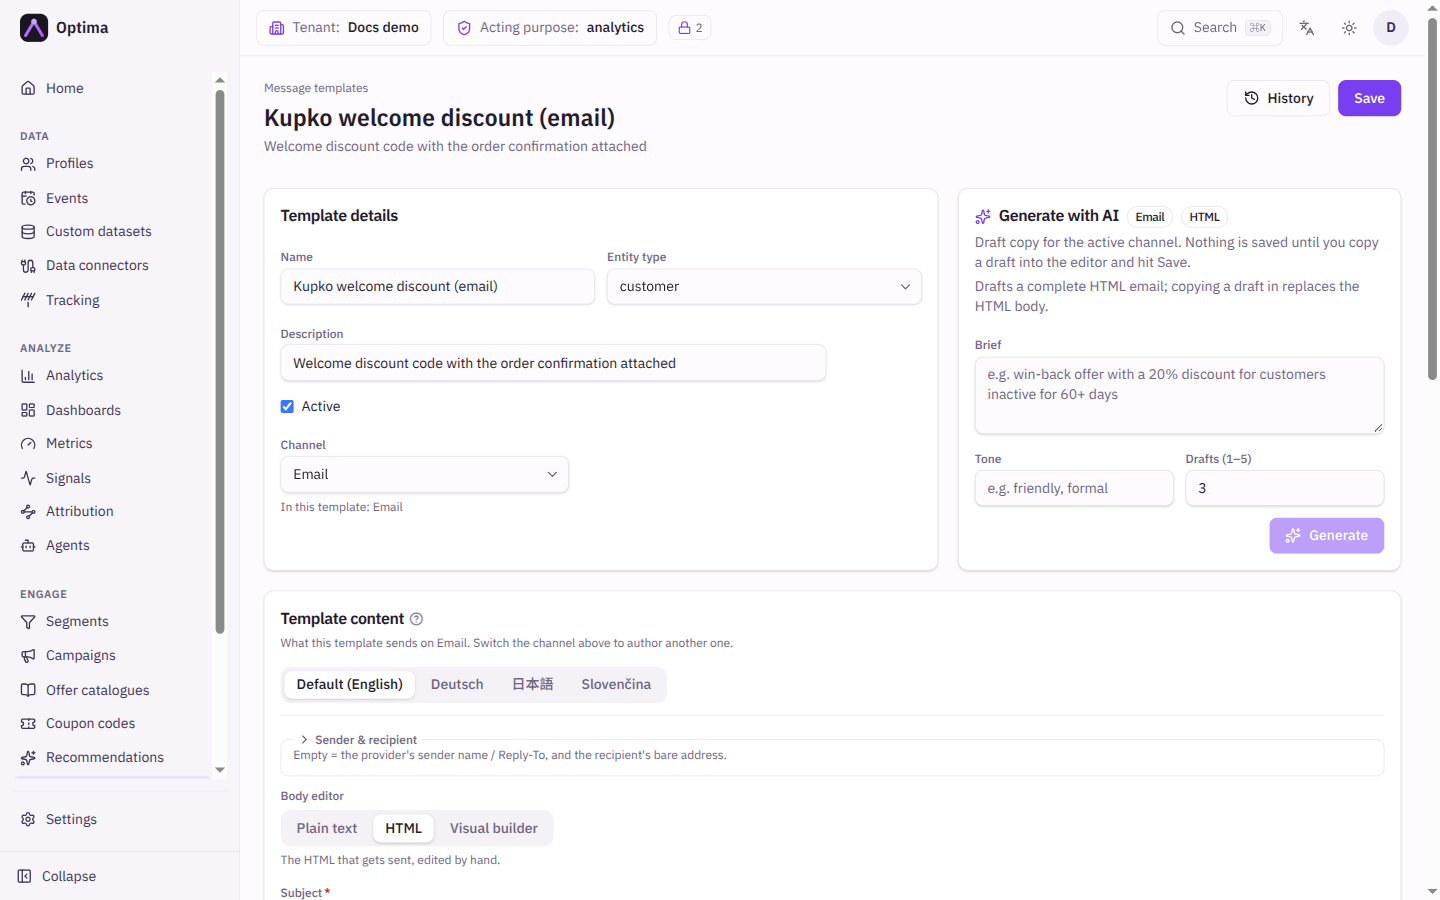
See Template editor for every field and Personalization for what you can insert.
Step 2: Create the campaign
- Open Campaigns and select New campaign.
- Enter a Name such as
welcome-flow, set Type to Journey-based and choose the same Entity type. - Select Create. You land on the campaign page.
- In the Delivery block select Edit and choose the Consent purpose, for example
marketing. Every send of the journey checks it. Add a Frequency cap if you want one, and silent hours so messages never arrive overnight.
The Audience and Content blocks are not used for a journey. Each journey carries its own entry trigger and each send step picks its own template. See Campaign page.
Step 3: Draw the journey
- On the Setup & delivery tab, in the Journeys card, select New journey.
- Open Journey settings and enter a Name, for example
welcome. Leave Re-entry cooldown empty so each customer is welcomed once. - Select the Trigger node. Choose Event, set Event type to
account_createdand save the dialog. - Select Send in the Add node palette. Configure it: Channel Email, Message template
welcome. Leave On fatigue on Defer. - Add a Wait node and set Wait for to Fixed duration,
2days. - Add a Split node with two arms, labelled
tipsandoffer, weights50and50, and Optimization None. Use Make it 100% if the total is off. - Add two Send nodes, one on each arm:
welcome-tipsandwelcome-offer. - Add an Exit node.
- Connect the nodes by dragging from a node's exit dot to the next node: Trigger to the first Send, to the Wait, to the Split. From the Split draw one edge to each Send, carrying the arm's label. Connect both Sends to the Exit.
- Select Save.
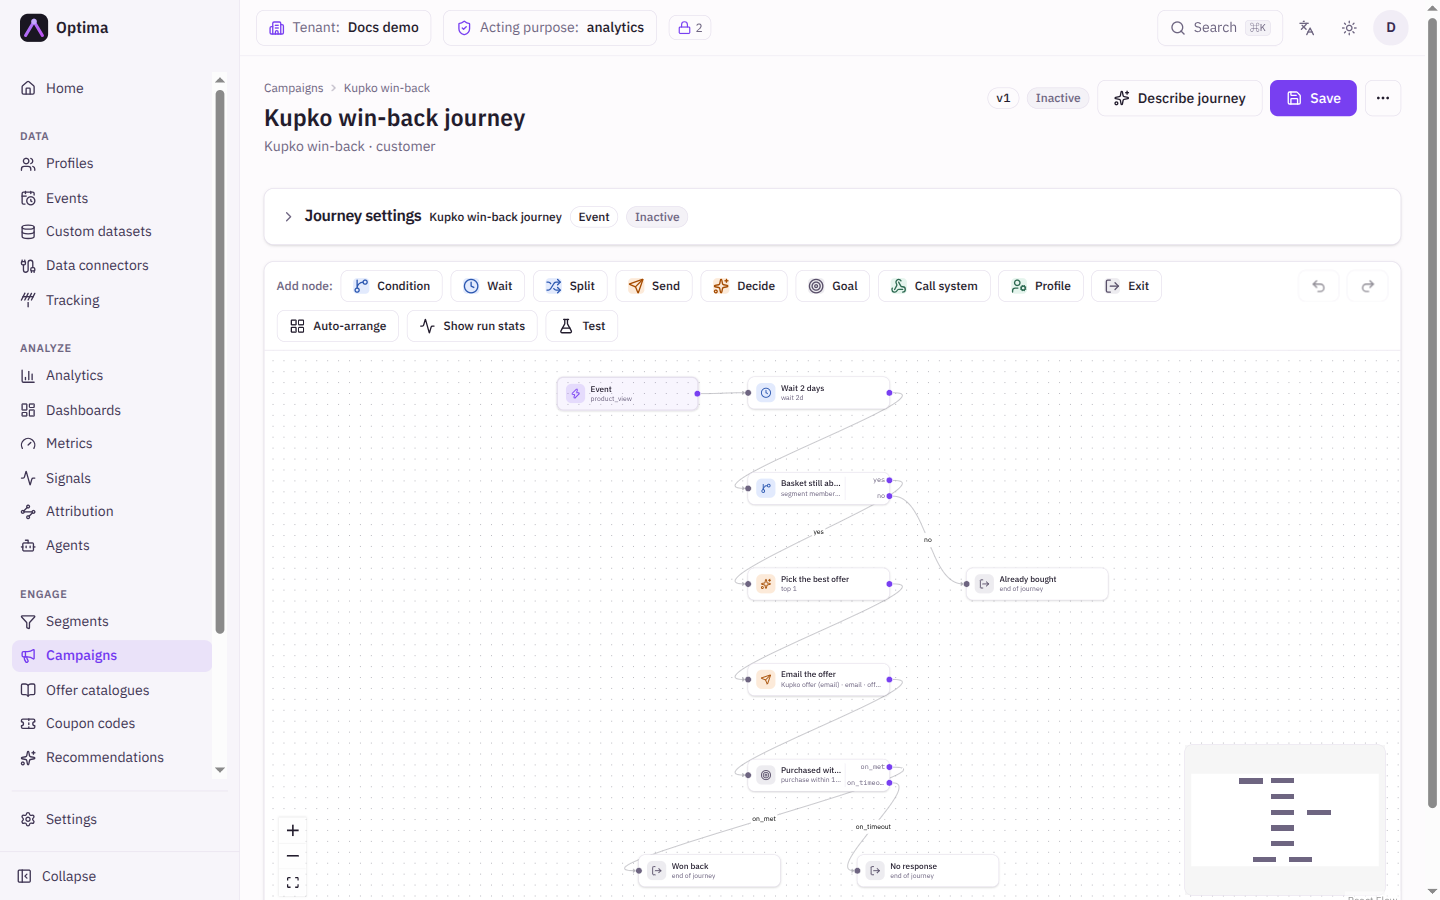
The server checks the whole graph when you save. A node with a problem is highlighted and selecting it shows the message. The usual ones are a split whose weights do not add up to 100%, an arm with no edge, a send without a template, and a path that does not end in an Exit. Each node is described on Journeys, Wait node and Split node.
Step 4: Test before launch
- On the canvas select Test. Pre-flight tests the saved version of the journey.
- On Projection read who would enter and what each send step would deliver. Send nodes nothing reaches lists steps that are valid but never visited.
- On Simulation enter the Profile ID of a test customer, pin the split to an arm under Assumptions, and run it. It walks that profile through the journey without sending anything.
See Pre-flight for how to read the funnel and the gates.
Step 5: Launch
- Back on the campaign page select Request approval. You can do this at any time. An approver finds it under Campaign approvals, reviews it and selects Approve. If you hold approval rights, activating is itself the approval.
- Select Activate and confirm. A journey campaign starts enrolling profiles.
- Check that the journey itself is on. In the Journeys card its Active column should be on. If not, use Turn on in the row's More actions menu.
A journey runs only while both the journey and its campaign are active. Editing what a campaign sends clears its standing approval, so request it again after such an edit.
Check that it worked
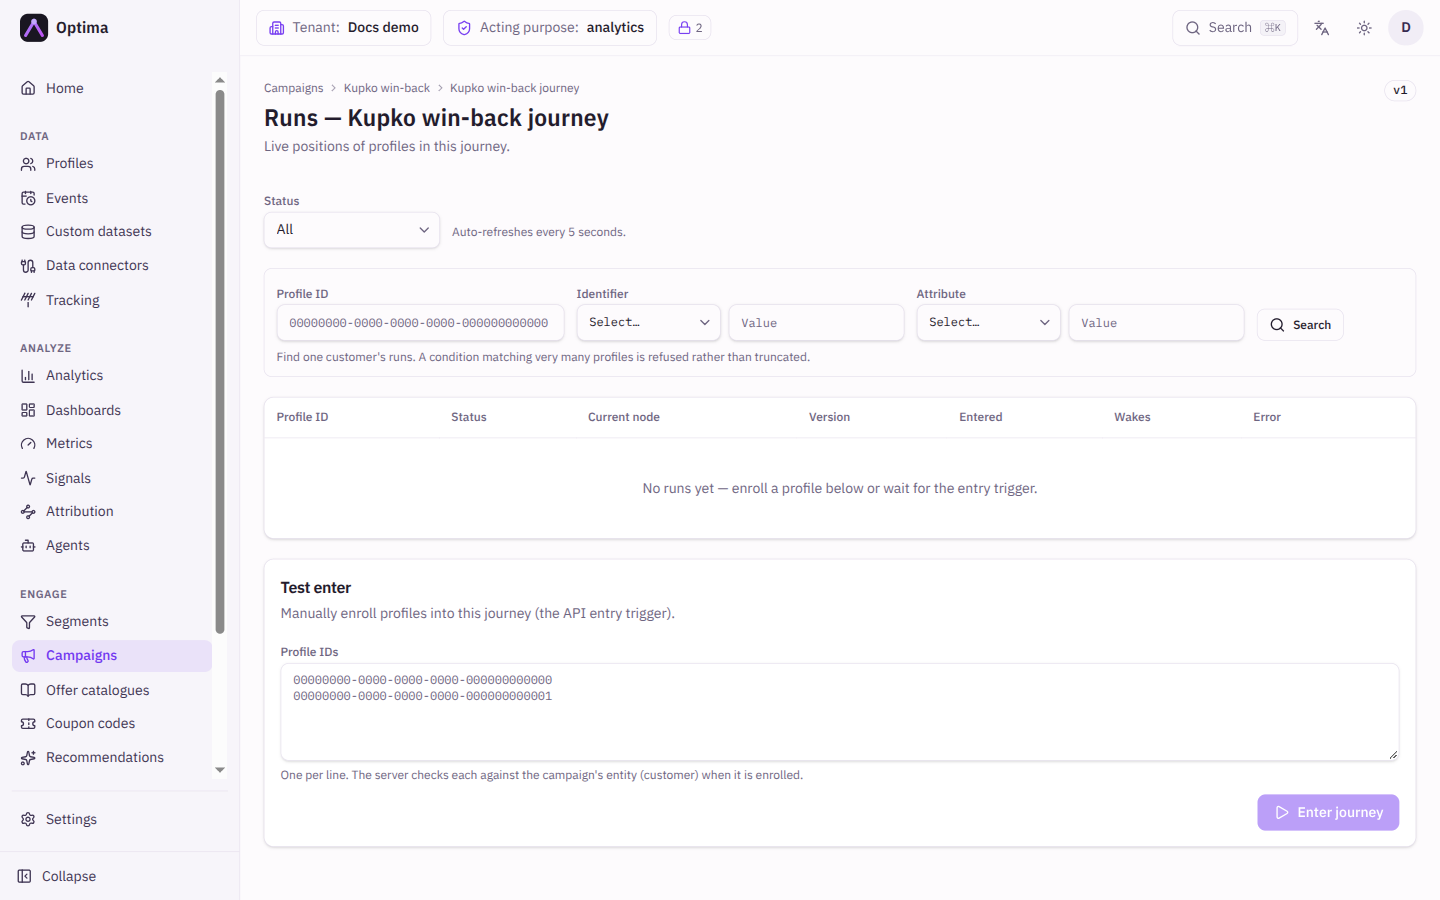
- Open the journey's Runs (from the Journeys card). Use Test enter, paste the profile ID of an internal test customer and select Enter journey. The outcome is Entered.
- Filter Status to Waiting. The test run waits at the Wait node, and Wakes shows when it moves on.
- After a real sign-up arrives, find its run with the Identifier filter. A customer who shows Already in, or in cooldown was welcomed before.
- On the campaign's Setup & delivery tab the Delivery funnel shows queued, sent and delivered counts.
Common problems
- No runs appear. Check the campaign and the journey are both Active, that the sign-up event is really recorded, and that the re-entry cooldown is not blocking the customer.
- Activate is refused. The campaign needs approval. Select Request approval.
- A customer got no email. Run pre-flight's What one person would get for them. The gate ladder names the check that stopped it, for example consent or a missing address.
- Save is refused with a list of issues. Select the highlighted node and read the message.
Next steps
- Turn the split into a real experiment: Run an A/B test.
- Add recommended products to the follow-up: Personalize with recommendations.
- Explore what delivery holds back: Channels and delivery.
Build a segment and sync it to an ad platform
Define an audience in the segment editor, connect a Google Ads account and keep the audience in step with an audience sync.
Run an A/B test
Compare two messages with a winner test on a journey split, measure against a control group and read the credit in Attribution.