Track your website
Create a tracking key, install the Web SDK, map page views to events, add a consent banner and check that events arrive.
This guide takes a website from nothing to page views arriving in Optima as events, with visitors asked for consent first. It uses the Web SDK; the code itself is covered in the Web SDK guide.
Before you start
- You need the
integration_editorrole for Tracking,content_editorfor the consent banner, anddata_viewerto check the result, or another role your administrator has given access to these areas — see Licences and roles. - The consent banner needs the consent banner feature of the Digital package. Tracking itself needs no extra licence feature.
- Your schema has an entity type for visitors, with an identifier that can hold the browser's device id (for example
visitorwithdevice_id), and an event typepage_view. Add them under Settings → Workspace → Schema if they are missing; see Schema. - The consent purposes you want to ask about exist, for example
analyticsandmarketing, with a consent policy that has an active version. See Privacy. - You can edit the pages of your website, or ask someone who can.
Step 1: Decide what the site may send
- Open Tracking in the Data group. It opens on the Settings tab.
- Choose the Web tracking entity, for example
visitor, and the Web device identifier key, for exampledevice_id. - Set Public base URL to the public address of your Optima host, as your developer or administrator gives it. The install snippet and the confirmation links are built from it.
- Choose a Consent mode. Optional stores hits whatever consent they declare, which is a good start while you test. Require drops hits that do not declare the Required purposes you pick.
- Pick the Collection purposes, the purposes stamped on what is stored.
- Select Save. The change reaches the public side within about 30 seconds.
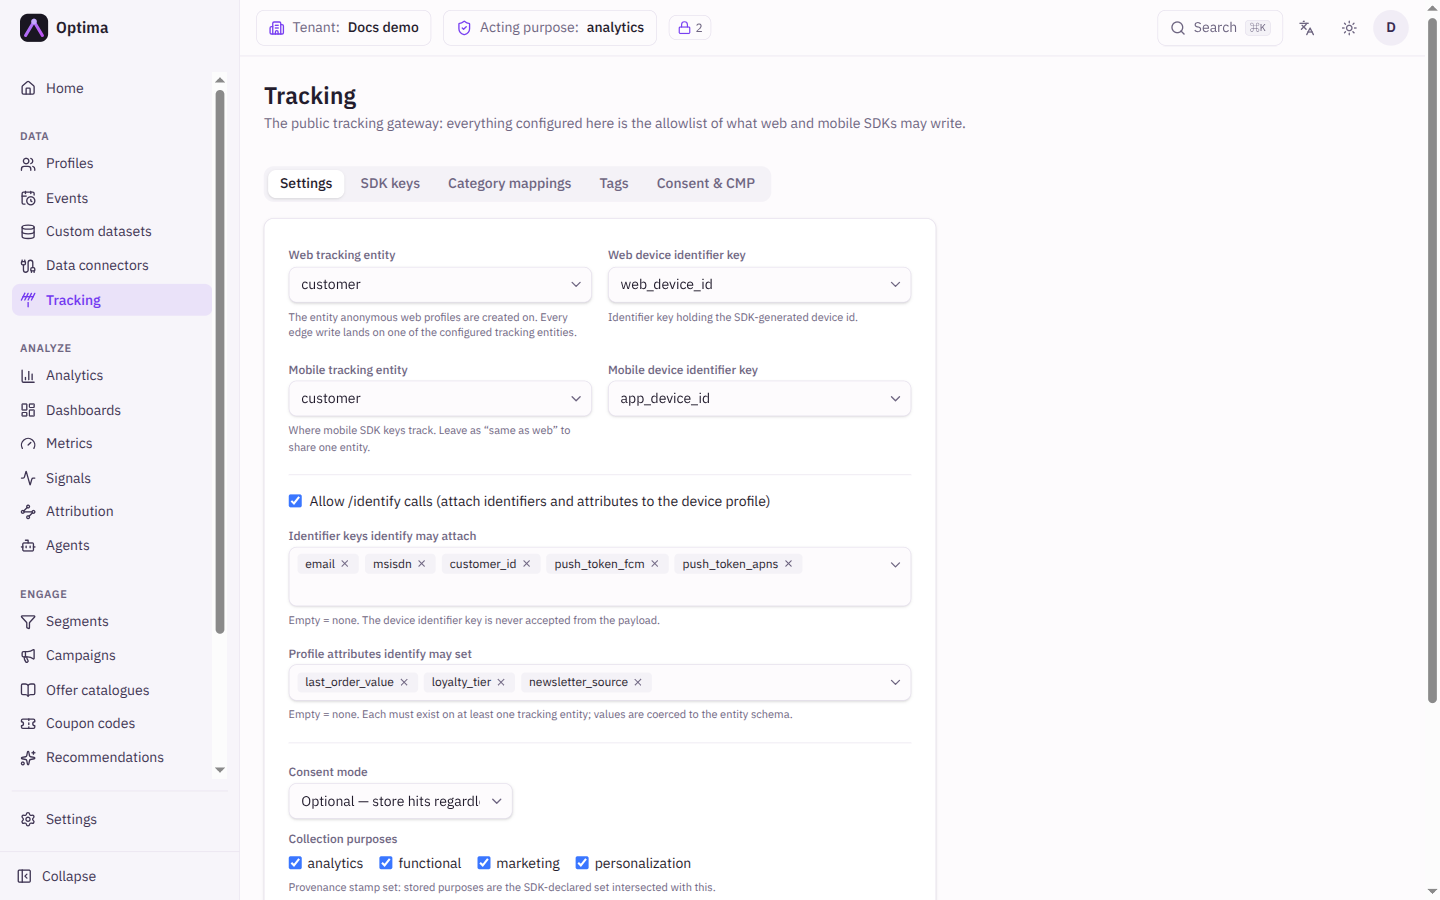
Everything is an allowlist: what you do not list here is dropped. Every setting is described in Tracking.
Step 2: Create an SDK key
- Open the SDK keys tab and select New SDK key.
- Enter a Name, for example
Kupko shop. Leave Platform on Web. - Under Allowed origins add every address the site is served from, with scheme and host and no path, for example
https://www.kupko.example. - Save.
The key is public by design: it can be read in the page source. The allowed origins and the allowlist from step 1 are what protect you. See SDK keys.
Step 3: Map page views to events
Only mapped categories become events.
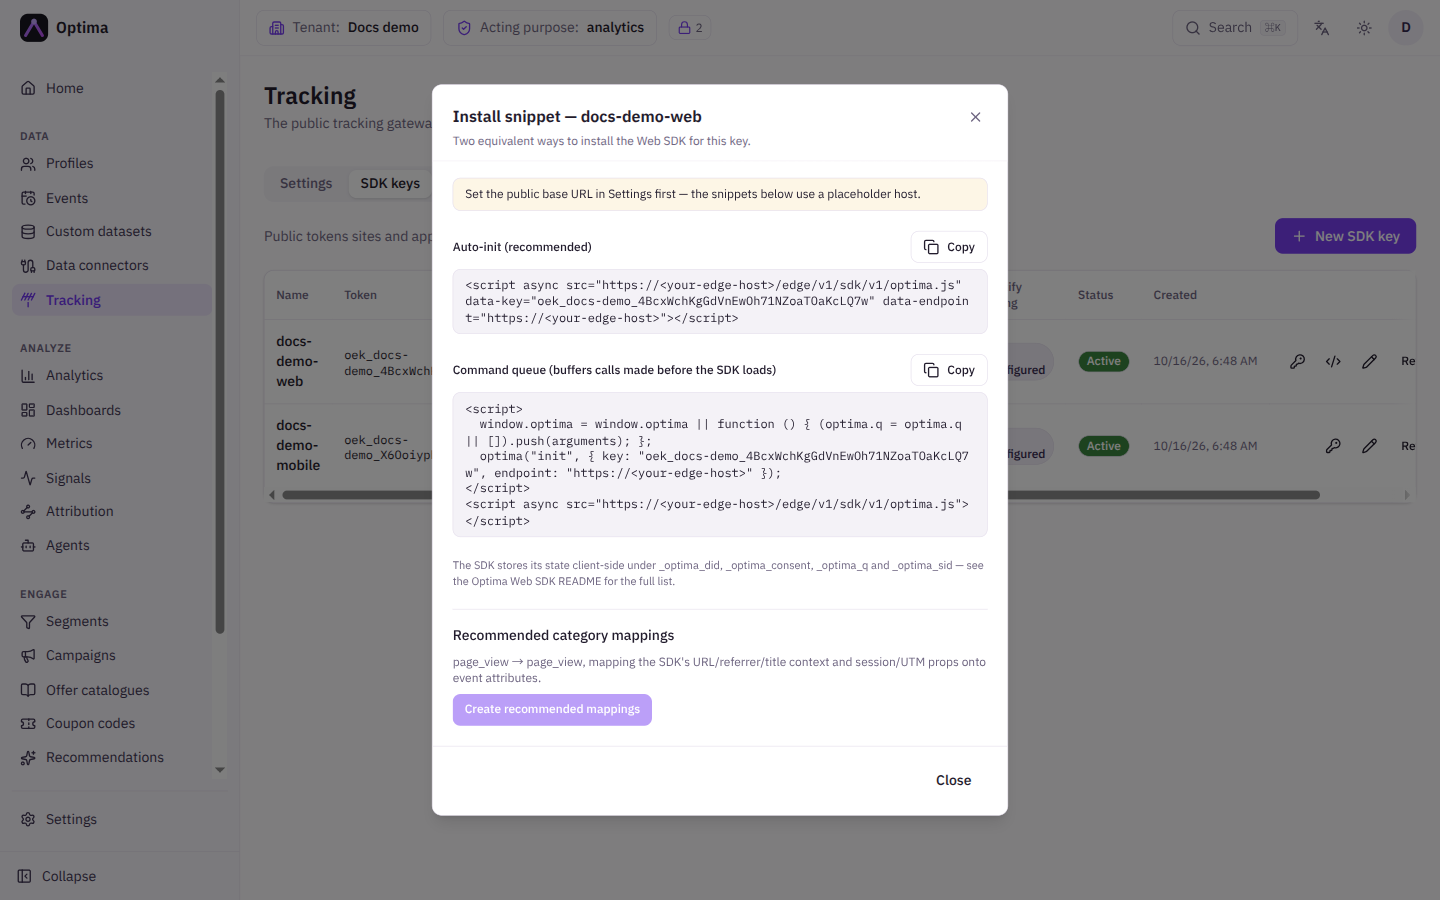
- In the SDK keys tab, select Snippet on your key. The dialog also offers Create recommended mappings, which creates a
page_viewmapping for the URL, referrer, title, session and campaign fields. Select it. It is disabled with a reason if there is nopage_viewevent type or the mapping already exists. - Or open the Category mappings tab, select New mapping, and enter Category
page_view, choose the Event typepage_view, and map$context.urlto the event'surlattribute and$context.titletotitle.
Step 4: Install the SDK
- With the Snippet dialog still open (or reopened), choose Auto-init (recommended) and select Copy. The snippet already holds your key and your host.
- Paste it into the head of every page, or into your site template.
<script async src="…the address from the snippet…"
        data-key="…your key…"
        data-page="auto"></script>
data-page="auto" sends a page_view for every page load. If your pages must call the SDK before it has loaded, use Command queue (buffers calls made before the SDK loads) instead. Configuration, events, identifying signed-in visitors and single-page sites are covered in the Web SDK guide.
Step 5: Ask for consent
You have two choices. Keep the consent platform you already use and let Optima read its answer, or show an Optima consent banner. This guide shows the banner.
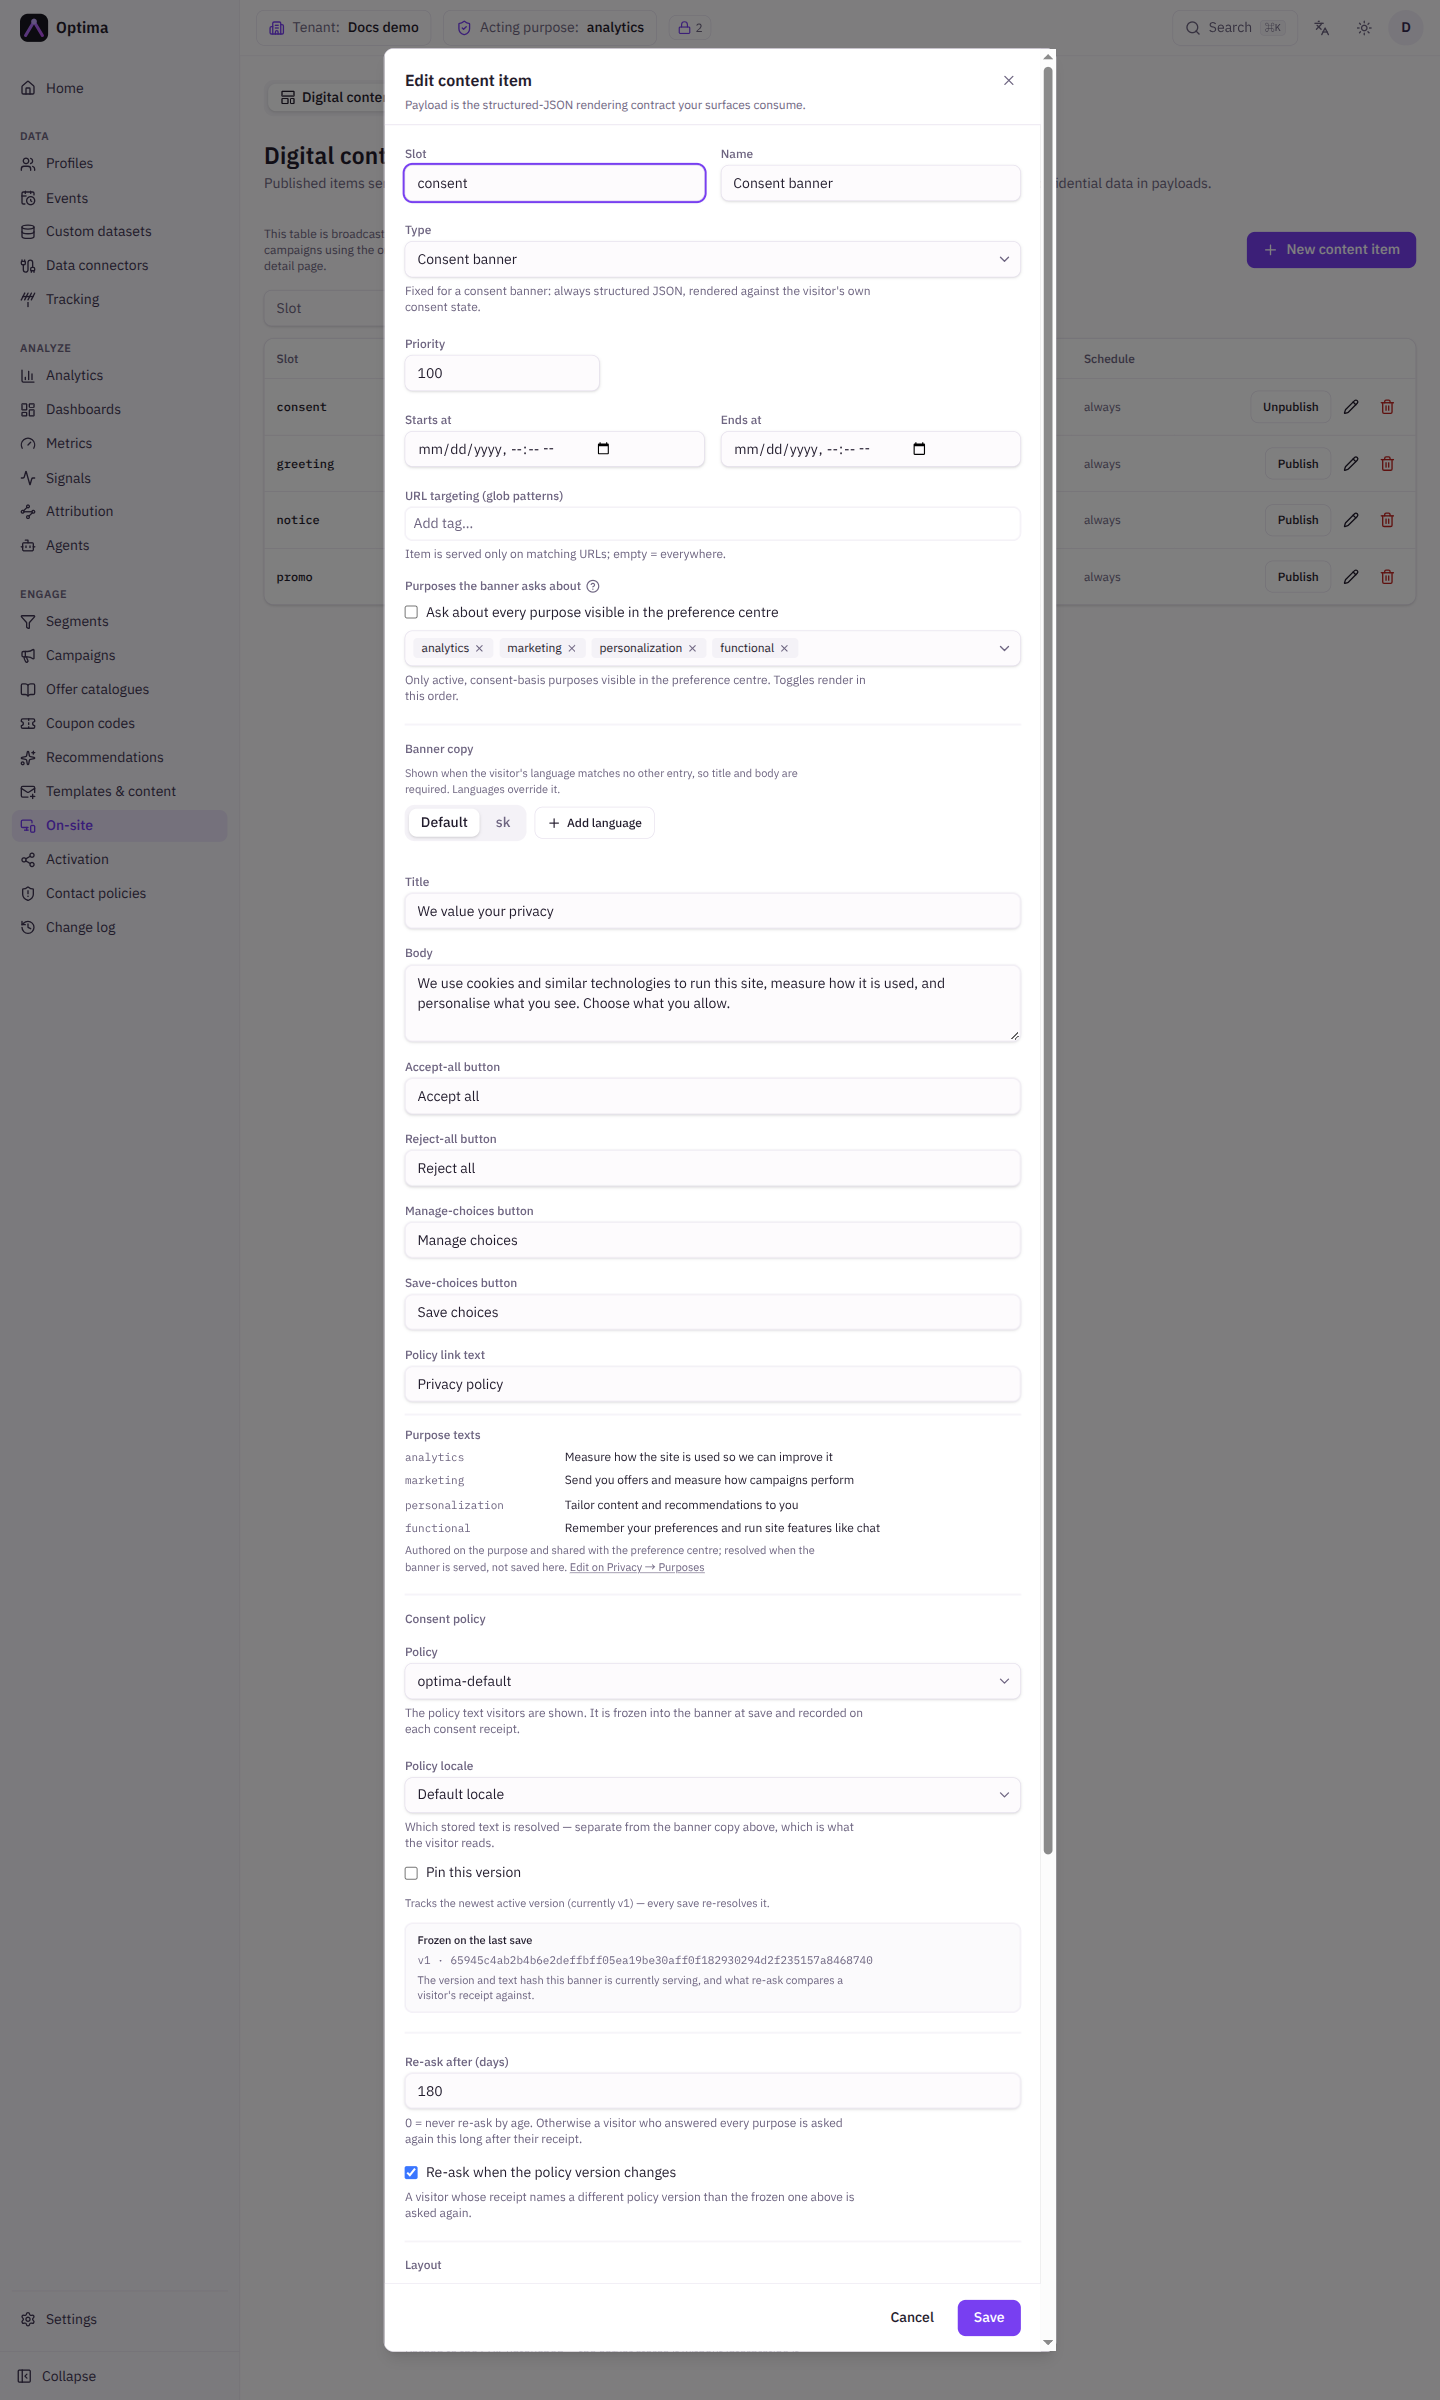
- Open On-site in the Engage group. On the Digital content screen select New content item.
- Set Type to Consent banner and choose the Slot your site asks for. Your developer knows the slot name.
- Under Purposes the banner asks about pick
analyticsandmarketing, or leave Ask about every purpose visible in the preference centre on. - Fill the Banner copy for the Default language: Title, Body and the button texts.
- Choose the Policy. It is frozen into the banner when you save and recorded on every consent receipt.
- Save the item, then select Publish on its row. Only published items are served.
If you use a consent platform instead, open the Consent & CMP tab of Tracking, set CMP signal mode to Observe, map its tokens in the Purpose map, and switch to Enforce once the Signal coverage shows nearly all traffic carrying a signal. See Consent banner and CMP.
Step 6: Check that it worked
- Open the site in a browser and, if the banner appears, answer it. Browse two or three pages.
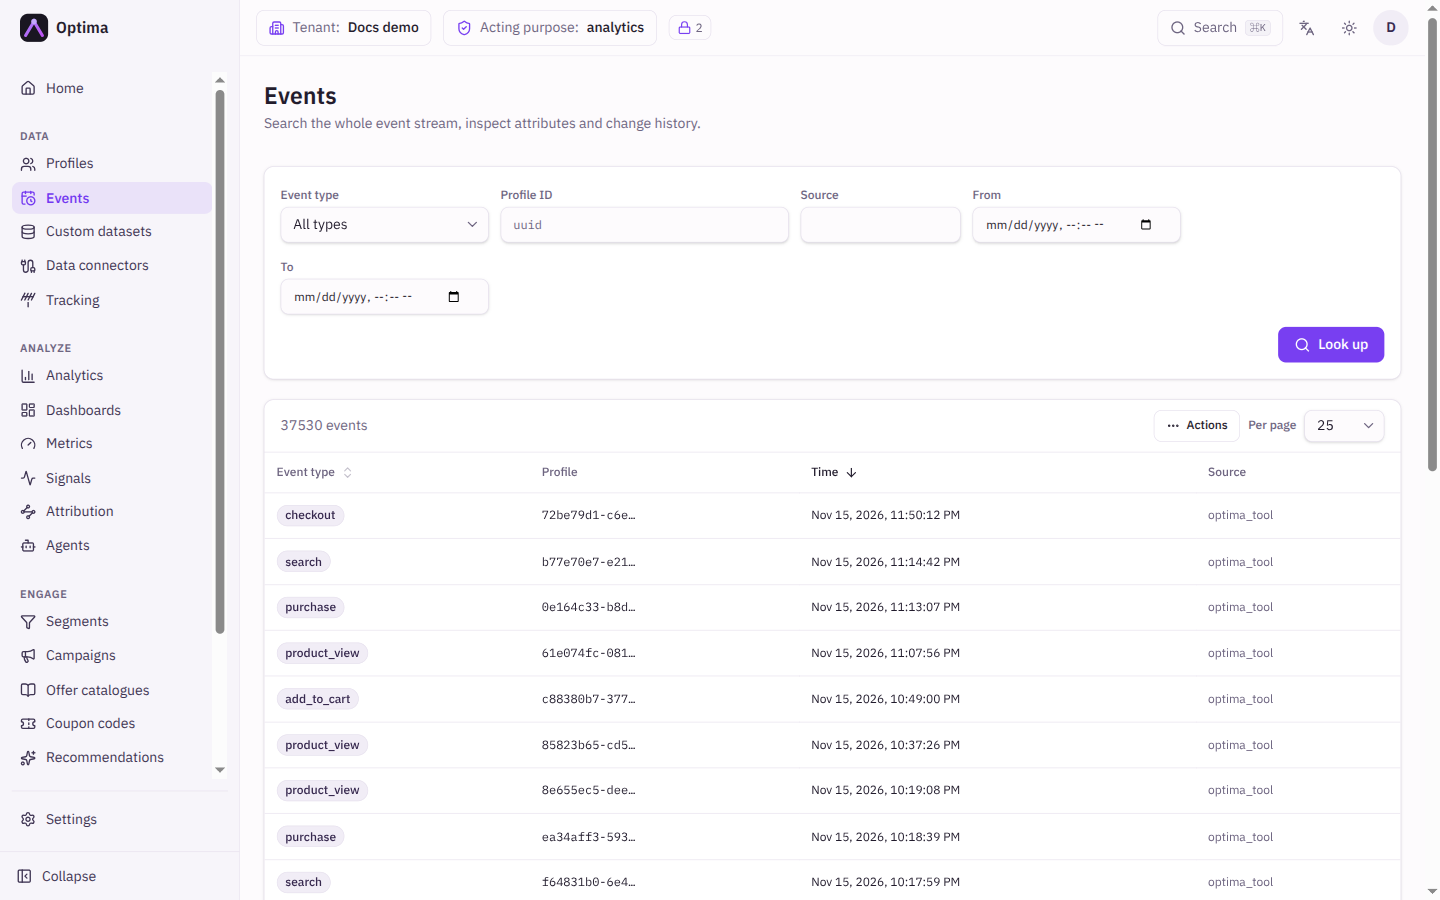
- Open Events in the Data group. Set Event type to
page_view, set Source if you know it, and select Look up. Events for your visits should appear within a minute, newest first. - Select the event type badge to open Event detail.
urlandtitleshould hold the page you visited. - Select the profile in the Profile column to open the visitor's profile. On Consent & Privacy the consents you gave in the banner are listed with their receipts.
Common problems
- Nothing shows up in Events. The category has no mapping, the mapping is inactive, or the event type has none of the attributes you mapped. Check Category mappings. Also confirm the snippet is on the page and the browser console shows no refused request.
- The browser refuses the request. The site's address is missing from Allowed origins. Add the exact scheme, host and port.
- Hits are dropped. Consent mode is Require and the visitor did not grant every required purpose. Switch to Optional while testing.
- The banner never appears. The item is not published, is outside its schedule, or its URL targeting does not match the page.
- The snippet shows a placeholder host. Set the Public base URL on the Settings tab.
Next steps
- Link signed-in visitors to their customer profile: Identify signing.
- Run marketing and analytics scripts only after consent: Tags.
- Collect sign-ups on your own page: Collect sign-ups with double opt-in.
- Mobile apps use the iOS, Android and React Native guides.
Import customers from a CSV file
Load customer profiles from CSV files in an Amazon S3 bucket with a data connector, then check that they arrived.
Build a segment and sync it to an ad platform
Define an audience in the segment editor, connect a Google Ads account and keep the audience in step with an audience sync.