Build a segment and sync it to an ad platform
Define an audience in the segment editor, connect a Google Ads account and keep the audience in step with an audience sync.
This guide builds a segment of customers who bought recently, connects an advertising account, and keeps a matching list on the platform up to date. Only customers who have given the consent you choose are uploaded, and only as hashed match keys.
Before you start
- You need
audience_editor(orcampaign_editor) to build the segment, andactivation_editorto create destinations and syncs.campaign_admincovers both. Or use another role your administrator has given access to these areas — see Licences and roles. - Activation is a separate package that needs the Campaign package. Without it Activation is not in the navigation. Segments are part of every licence.
- A Google Ads account, and the four Google Ads credentials Optima needs: Developer token, Client id, Client secret and Refresh token. Your Google Ads administrator or your integration specialist can supply them.
- A consent purpose for advertising, for example
advertising, and profiles that carry an identifier you can match on, such asemail. See Consent and purposes.
Step 1: Build the segment
- Open Segments in the Engage group and select New segment.
- Choose the Entity type, for example
customer, and enter a Name such asRecent buyers. Add a Folder likeAdvertising/Exclusionsif your team files segments. - In the Filter builder add a condition on the purchase event: under event: purchase choose aggregate… with count of events in 14d at least 1. You can instead describe it under Describe in English, for example "customers who purchased in the last 14 days", and select Suggest audience, then read the drafted rule before you trust it.
- Select Preview sample. It shows how many profiles match and up to 25 of them. Check that they are the people you meant.
- Select Save segment.
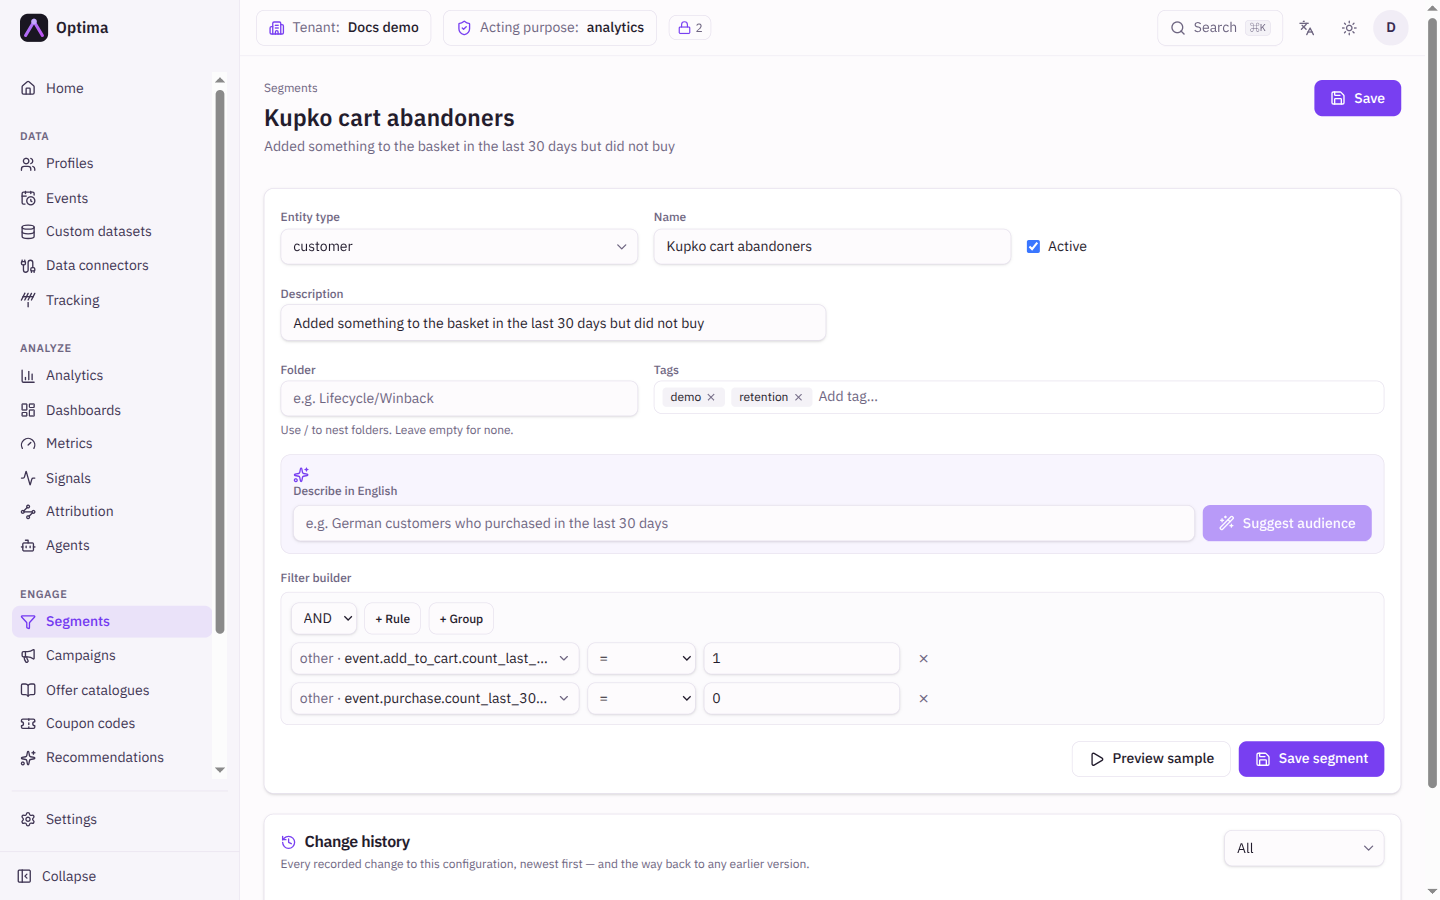
A segment stores the question, not a list of people. Its members are worked out again every time it is used, including by each sync run. See Segment editor and Query filters.
You do not need to add a consent condition to the segment. The sync checks consent for every customer on every run.
Step 2: Connect the ad account
- Open Activation in the Engage group. The Destinations part lists your connections to ad accounts.
- Select New destination.
- Enter a Name, leave Platform on Google Ads, and enter the Ad account id, for example
123-456-7890. Under Settings add a Login customer id if access goes through a manager account. - Under Credentials enter the four Google Ads credentials. They are stored encrypted and are never shown again.
- Save, then select Test connection (the plug icon) on the new row. The result appears under the row. If it fails, check the account id and the credentials; Replace credentials lets you enter them again.
Step 3: Create the audience sync
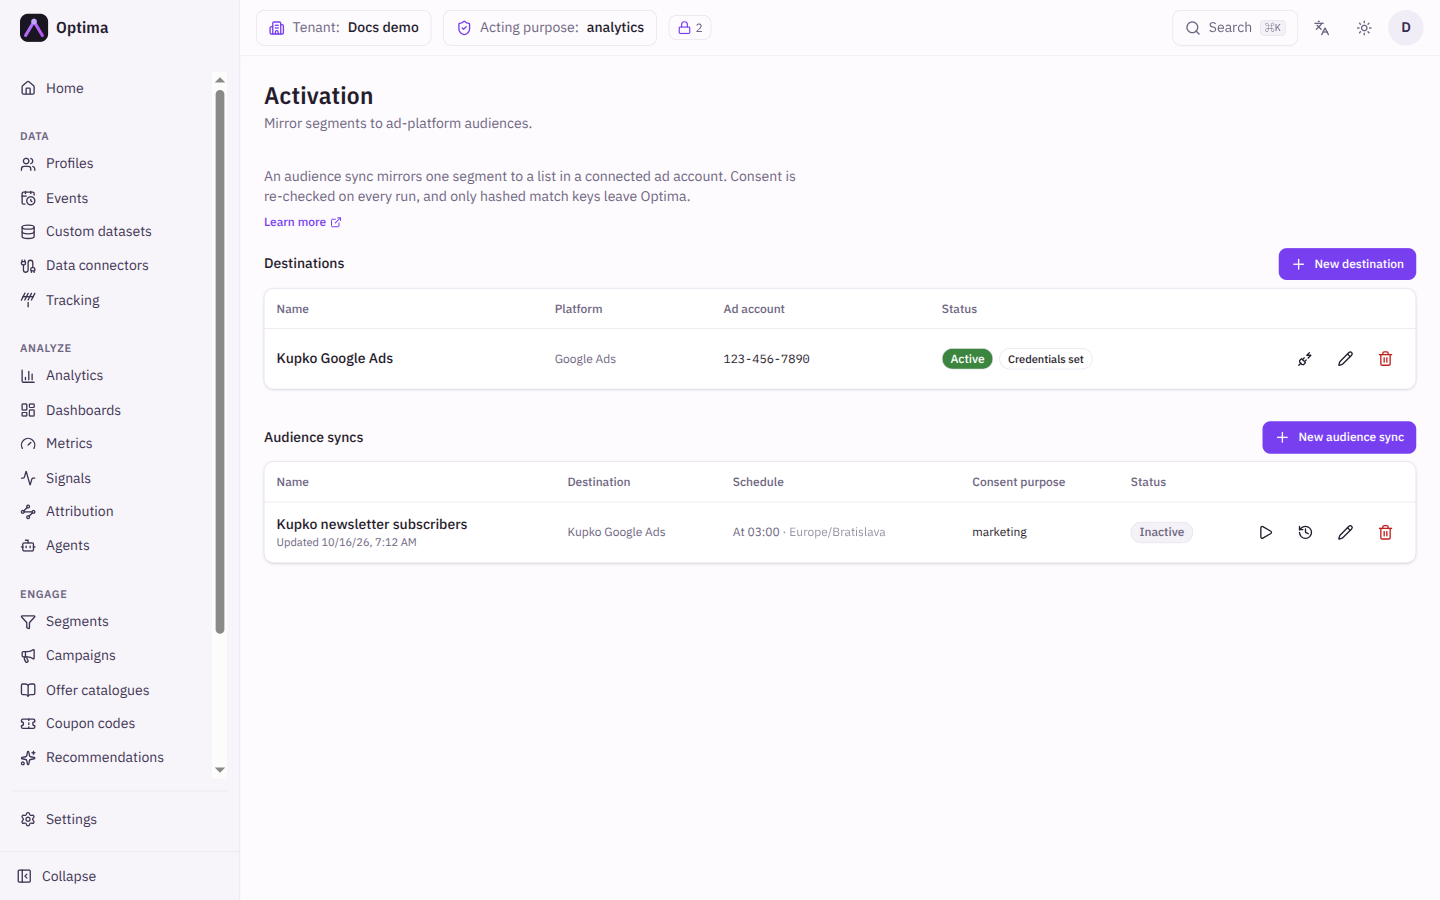
- In Audience syncs select New audience sync. It is unavailable until a destination exists.
- Enter a Name, for example
Recent buyers. It is also the default name of the list on the platform. - Choose the Destination and the Segment you saved.
- Under Match keys keep Email with the identifier key
email, or select Add match key for a phone number. Values are normalised and hashed before upload. - Leave Sync mode on Full reconcile, so customers who withdraw consent or are erased drop off the list by themselves.
- Choose the Consent purpose, which defaults to
advertising. A customer who has not granted it is skipped. - Leave Schedule on Manual only for now. Save.
Step 4: Run it and read the result
- Select Sync now on the sync. The console confirms with Sync queued.
- Select Run history. The newest run goes from Running to Completed.
- Read the counts: Matched is the profiles in the segment, Consented is those who have the consent purpose, Added and Removed are the changes made on the platform, Skipped are customers left out for lack of consent or of a usable match key, and Held out are customers in the global control group.
If Consented is far below Matched, many of the people in the segment have not agreed to advertising. That is by design.
Step 5: Put it on a schedule
- Select Edit on the sync.
- Choose a Schedule and time zone, for example daily at 06:00, and turn Run on schedule on.
- Save.
In Google Ads, the list now appears under the sync's name. Use it as a targeting or exclusion audience. The platform only accepts customers it can match, and the list grows for a while after an upload, so it shows fewer people than the segment.
Check that it worked
- Run history shows a Completed run with Added above zero on the first run.
- A second run shows few Added and Removed: a steady audience changes slowly.
- Withdraw consent for one test profile (see Profile detail), run the sync again and look for it in Removed.
Common problems
- A sync cannot be created. There is no destination yet.
- Test connection fails. Read the platform's answer under the row. Check the Ad account, the Login customer id and all four credentials.
- A scheduled run did not happen. Run on schedule is off or the destination is not Active.
- Fewer people on the platform than Added. The platform drops customers it cannot match.
Next steps
- Use the same segment as the audience of a campaign: Send a welcome journey.
- Keep part of your audience out of all contact: Control groups.
- Segments, signals and cohorts explains how segments relate to cohorts.