Import customers from a CSV file
Load customer profiles from CSV files in an Amazon S3 bucket with a data connector, then check that they arrived.
This guide sets up a connector that reads CSV files from an Amazon S3 bucket, turns each row into a customer profile, and runs on a schedule. By the end you have imported a first file and checked the profiles it created.
Before you start
- You need the
integration_editorrole to create and run connectors, anddata_viewerto check the result, or another role your administrator has given access to these areas — see Licences and roles. Data connectors are part of the Connect licence feature. - A bucket with at least one CSV file, and an access key and secret for a user who may list and read that bucket. The permissions are listed on S3 credentials.
- The attributes you want to fill already exist on your customer entity type, and the entity type has an identifier such as
email. If not, add them first under Settings → Workspace → Schema; see Schema. - The consent purpose the data was collected under exists, for example
newsletter. See Privacy.
A small file looks like this. The first row holds the column headings.
email,fname,tier
jane@example.com,Jane,gold
omar@example.com,Omar,silver
Step 1: Create the connector
- Open Data connectors in the Data group and select New connector.
- Enter a Name, for example
CRM customers nightly. - Set Kind to Batch source and Protocol to Amazon S3.
- Leave Data type on Profiles and choose the Entity type, for example
customer. - If your files carry timestamps without a time zone offset, set Timezone to an IANA name such as
Europe/Bratislava. Change CSV delimiter if the file uses semicolons or tabs. - Under Collection purposes tick the purpose the data was collected under. Every imported value is stamped with it, so a later erasure can find the data. Leave Lawful basis override on Derive from purposes unless the whole feed has one known basis. See Collection purposes and clearance.
- Under Connection enter the Endpoint, Region and Bucket. Under Credentials enter the Access key id and Secret access key.
- Select Create. The console opens the new connector's detail page.
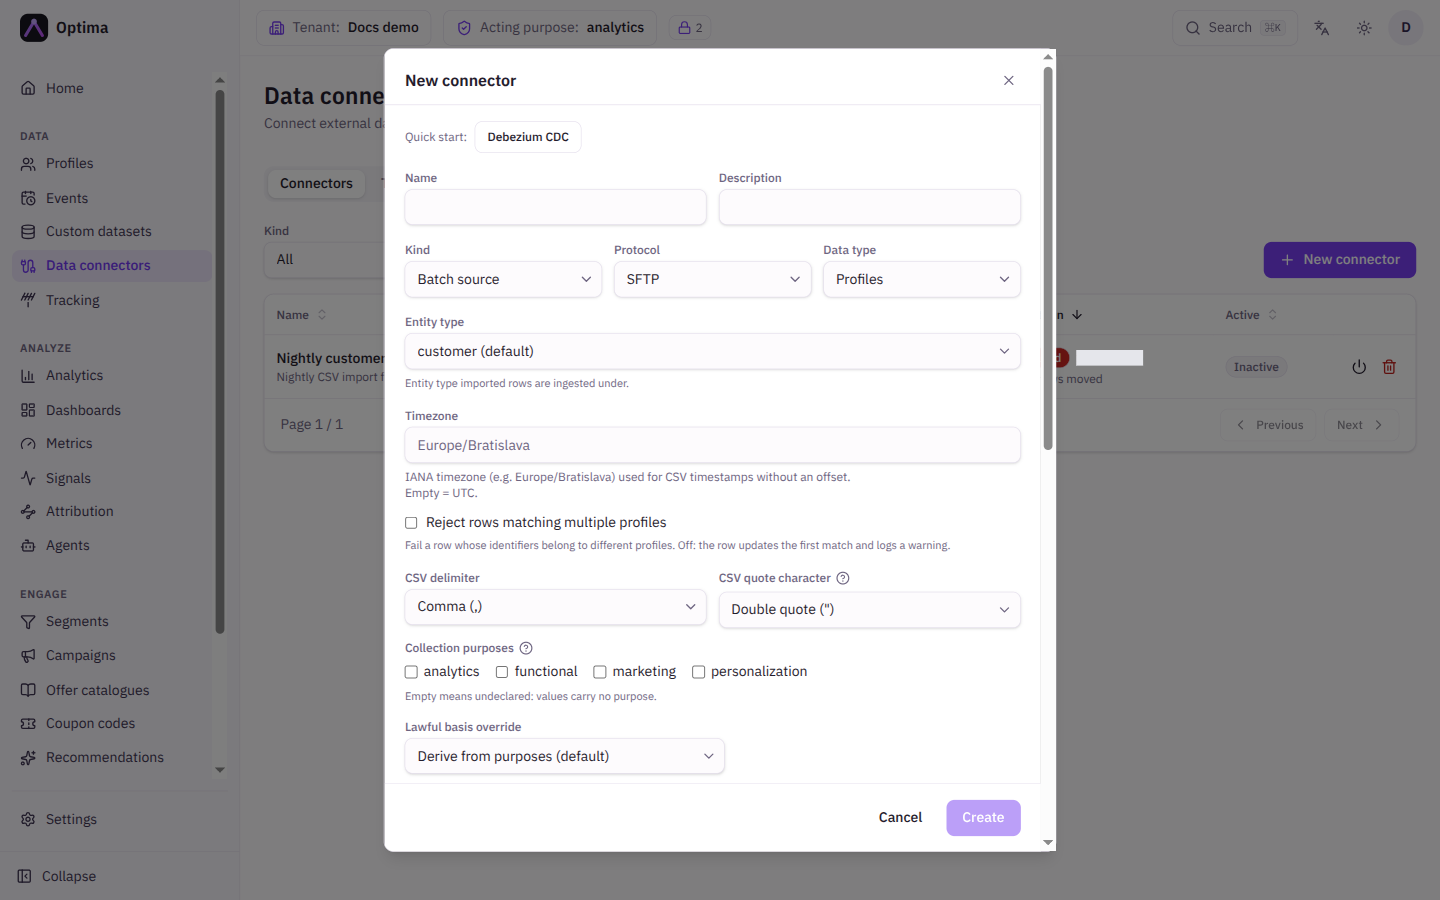
Credentials are write-only. Once saved they cannot be shown again, only replaced. More on every field is in Data connectors.
Step 2: Test the connection
On the Overview tab select Test connection. A batch source lists a few files from the bucket. A green message means Optima can reach the bucket. If it is red, select Show details: the usual causes are a wrong Region or Endpoint, or an access key without permission to list the bucket.
Step 3: Map the columns
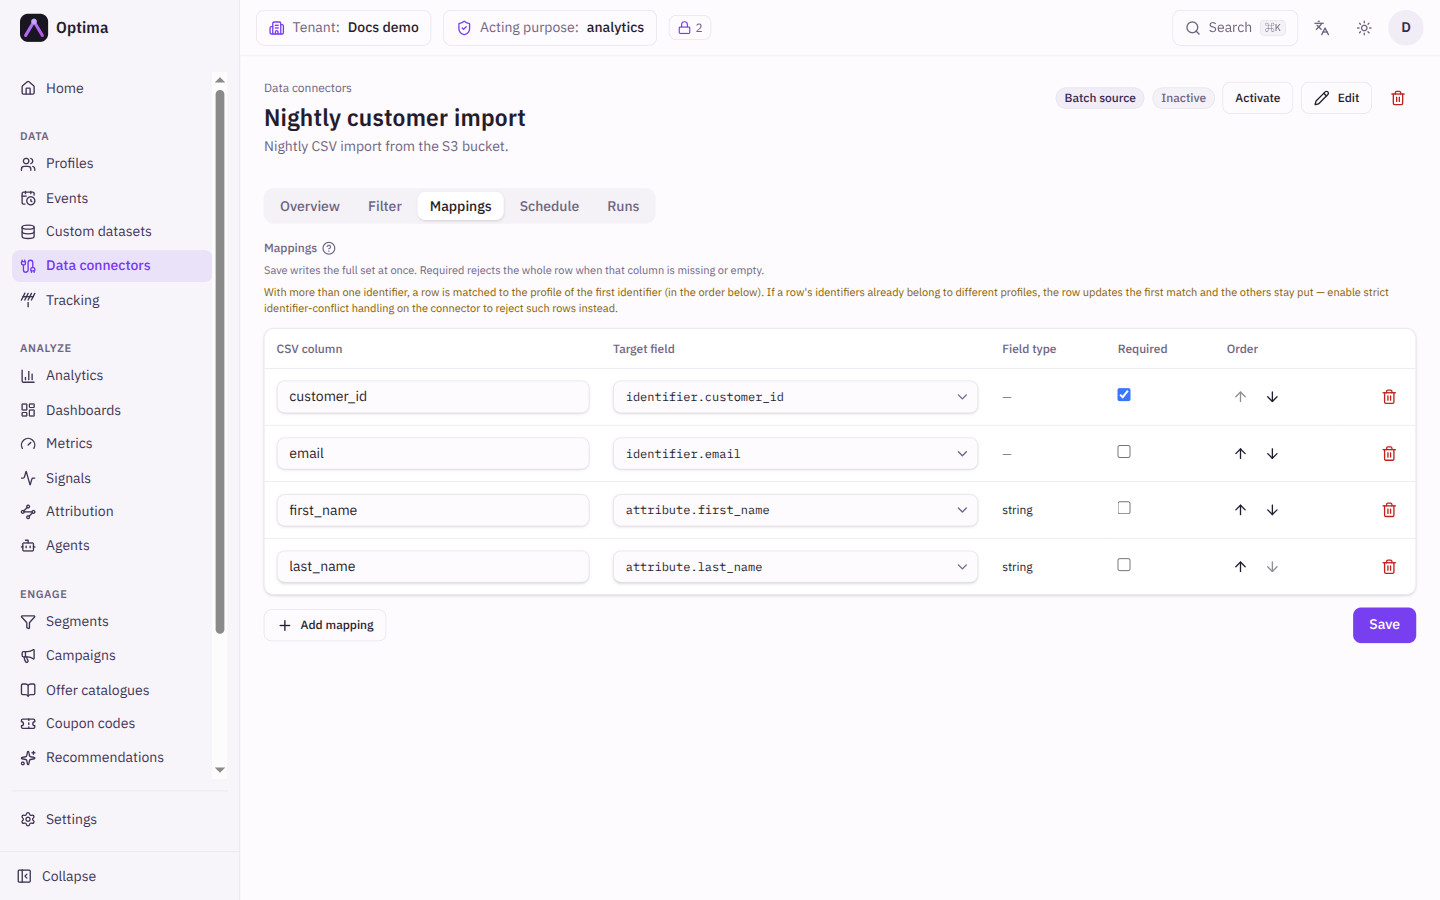
- Open the Mappings tab and select Add mapping for each column.
- Type the CSV column exactly as in the heading row, and choose the Target field. For the example file:
emailtoidentifier.email(tick Required),fnametoattribute.first_name,tiertoattribute.loyalty_tier. - Select Save.
At least one identifier. column is needed, because Optima matches each row to an existing profile by identifier, or creates a new one. Field types come from your schema. See Field mappings.
Step 4: Say where the files are and when to read them
- Open the Schedule tab.
- Set Path pattern to the folder and file names to read, for example
crm/*.csv. Leave File matching on Glob. - Choose a schedule under Runs, for example Every day (other options are Custom (cron) and Manually only), and check the Time zone. Leave it on Manually only while you are testing. Tick One-time job if this is a single migration.
- Select Save.
Step 5: Activate and run the first import
- In the page header select Activate if the connector shows Inactive.
- On the Schedule or Runs tab select Trigger now.
Each file is imported once. A later run skips files it has already imported, so adding new files to the same path is safe.
Step 6: Check that it worked
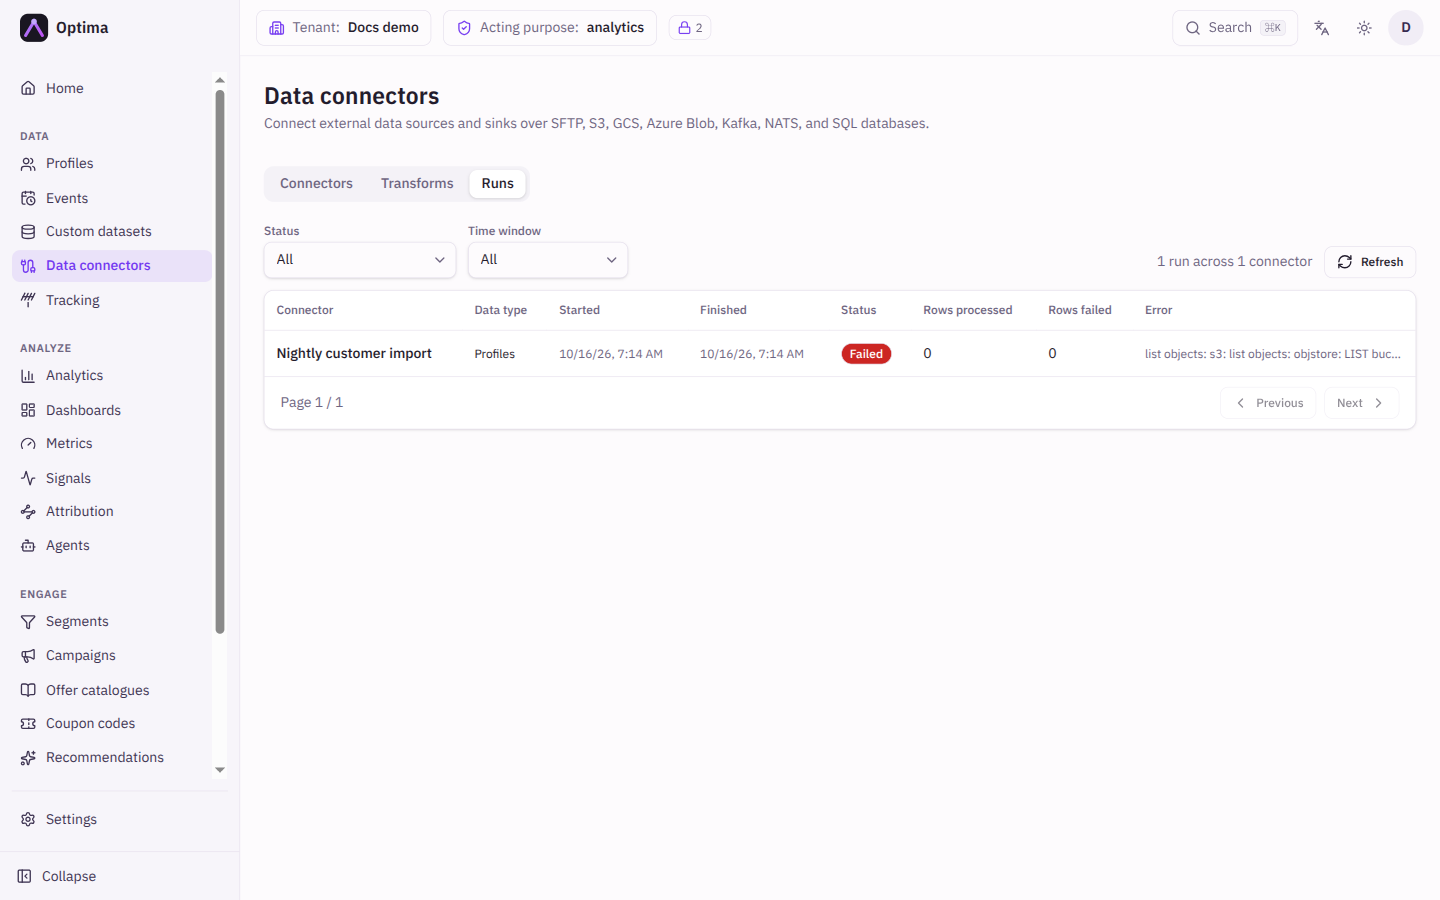
- Open the Runs tab. The newest run moves from Running to Success. Partial means some rows failed and the rest were imported. Select the row to read the Run detail, with the files and the error. Rows processed and Rows failed should match what you expect.
- Open Profiles in the Data group. Choose By identifier, set Entity type to
customer, Identifier key toemail, enterjane@example.comand select Look up. - Open the profile. On Overview check that the attributes hold the values from the file. On History you can see the change that created or updated each value.
Common problems
- Save is disabled on Mappings. A mapping to an identifier is missing. The warning above the table says what.
- Run says Success but no new profiles appear. The path pattern matched no file, or every file was already imported. Check Path pattern and the bucket contents.
- Rows fail with "required". The column is empty in those rows. Clear Required if blanks are acceptable.
- Dates are hours out. Set Timezone on the connector for timestamps that carry no offset.
- A row updated the wrong profile. The identifiers in the row belong to different profiles, and the first match wins. Turn on Reject rows matching multiple profiles on the connector to fail such rows instead.
Next steps
- Read Dead letters and retries to understand failed rows.
- Use the imported profiles in a segment.
- Identity explains how imported identifiers join profiles together.